Most people love a good scoop of ice cream after dinner. The creamy texture and sweet flavor provide a comforting end to the day. Unfortunately, traditional store-bought options often come loaded with heavy cream, artificial flavors, and excessive amounts of refined sugar. For those dealing with dairy intolerance or trying to maintain a nutritious diet, finding a satisfying alternative can feel impossible.
That changes with this simple, naturally sweet solution. You can create a rich, satisfying treat using items you probably already have in your kitchen. This healthy dessert recipe requires only three ingredients, minimal prep time, and absolutely no dairy. It is often referred to as “nice cream” because it is kind to your body and completely plant-based.
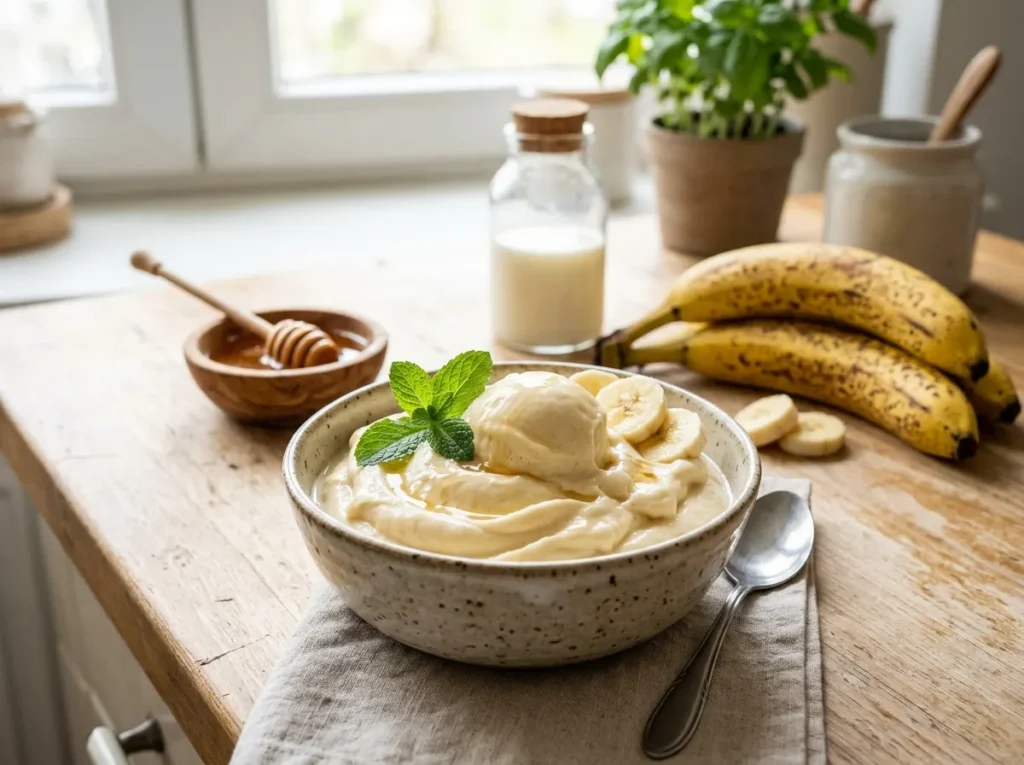
Throughout this guide, we will walk you through the process of making the perfect banana ice cream recipe. You will learn the exact steps to achieve a flawless soft-serve consistency, discover delicious flavor variations, and pick up essential tips for freezing and storing your homemade vegan ice cream.
The Unbeatable Benefits of Banana Ice Cream
Creating your own dessert at home brings a host of advantages that go far beyond basic taste. This simple treat is a nutritional powerhouse disguised as a decadent indulgence.
Health benefits of bananas
Bananas are incredibly nutritious. They are packed with potassium, which helps maintain healthy blood pressure and supports heart health. They also provide a great source of dietary fiber to keep your digestion running smoothly. Furthermore, bananas contain essential vitamins like Vitamin B6 and Vitamin C. Eating them can even act as a mild mood booster, thanks to the presence of tryptophan and beneficial carbohydrates.
Why “nice” cream is nicer
Traditional ice cream relies heavily on cow’s milk and processed sugars to achieve its signature taste. This homemade vegan ice cream removes both of those elements entirely. Because it is completely dairy-free, it is perfectly safe for those with lactose intolerance or milk allergies. There is also no added sugar required. The natural sweetness of the fruit provides all the flavor you need, allowing you to enjoy a whole-food dessert without any guilt.
Cost-effective and accessible ingredients
Gourmet dairy-free desserts at the grocery store can be surprisingly expensive. Making your own version at home costs pennies by comparison. Bananas are consistently one of the cheapest fruits available year-round. You do not need to hunt down rare ingredients or spend a fortune at specialty health food stores.
Quick and easy preparation
You do not need an expensive ice cream maker or hours of churning to create this dish. The entire blending process takes only a few minutes. As long as you remember to place your fruit in the freezer ahead of time, you can whip up this healthy dessert recipe whenever a sugar craving strikes.
Customizable for various tastes
One of the best aspects of this base recipe is its versatility. It serves as a blank canvas for almost any flavor profile you can dream up. Whether you are cooking for a family with diverse preferences or trying to accommodate specific dietary restrictions, you can easily adjust the recipe to suit everyone’s needs.
The Core Recipe: 3-Ingredient Banana Ice Cream
Ready to make your own batch? The classic version requires very little effort but delivers massive flavor.
Ingredients
- Ripe bananas: You will need 3 to 4 large bananas.
- Splash of milk: Use 2 to 3 tablespoons of your preferred milk. Almond, oat, soy, or coconut milk work perfectly for a vegan option.
- Vanilla extract (optional): A half teaspoon of pure vanilla extract elevates the flavor profile.
Equipment needed
To achieve the best texture, you need a strong motor. A high-speed blender or a quality food processor is essential. You will also need a freezer-safe container to store any leftovers.
Step-by-step instructions
1. Freezing the bananas
The key to a creamy texture starts with the freezing process. Peel your bananas and slice them into small, even coins. Place the slices in a single layer on a parchment-lined baking sheet and freeze them for at least four hours. Solidly frozen fruit is an absolute requirement for this recipe to work.
2. Blending process
Transfer the frozen slices into your food processor or high-speed blender. Begin pulsing the machine. Initially, the fruit will look crumbly and chalky. Do not worry; this is completely normal. Stop the machine to scrape down the sides with a rubber spatula. Add your splash of milk and the vanilla extract. Continue blending.
3. Consistency check
As you keep blending, the mixture will suddenly transform. It will shift from a crumbled mess into a smooth, luxurious puree that looks exactly like premium soft-serve ice cream. Stop blending as soon as you reach this stage to prevent the mixture from melting due to the heat of the motor.
4. Serving immediately vs. freezing for later
For a soft-serve experience, scoop the ice cream into bowls and eat it right away. If you prefer a firmer texture that you can scoop into cones, transfer the mixture into an airtight container and place it back in the freezer for one to two hours before serving.
Mastering the Texture: Tips for Perfect Creaminess
A few simple techniques separate a mediocre fruit puree from a truly spectacular dessert.
The ripeness factor
The condition of your fruit matters immensely. Green or pure yellow bananas contain more starch and less sugar, resulting in a chalky texture and a bland taste. You want bananas that are heavily speckled with brown spots. These brown spots indicate that the starches have converted into natural sugars, ensuring your dessert is delightfully sweet and easy to blend.
Freezing bananas correctly
Never freeze bananas whole with the peel on. They become incredibly difficult to peel and blend once solid. Always slice them before freezing. Using a baking sheet prevents the pieces from freezing together into one massive, unblendable clump. Once the slices are individually frozen, you can transfer them to a freezer bag to save space. This method also prevents freezer burn.
Blending techniques
Patience is vital during the blending phase. If you run the machine continuously without stopping, the blades might just spin empty air while the frozen fruit sticks to the walls. Use the pulse function and frequently scrape down the sides. This ensures every piece gets processed evenly.
Avoiding common pitfalls
If your mixture is too icy, you likely added too much liquid. Only use a tiny splash of milk to help the blades catch. If the mixture is too watery, your fruit may not have been frozen completely solid, or you blended it for too long.
Achieving soft-serve vs. scoopable consistency
Remember that the food processor creates friction. This friction slightly warms the mixture, resulting in a soft-serve texture. To get traditional, hard scoops, you must allow the finished blend to rest in the freezer so it can firm up again.
Flavor Fiesta: Delicious Variations and Add-ins
Once you master the base banana ice cream recipe, you can start experimenting with exciting additions.
Chocolate Lovers
Transform your base into a rich chocolate treat by adding two tablespoons of unsweetened cocoa powder during the blending process. Fold in a handful of dark chocolate chips or drizzle chocolate syrup over the top before serving.
Fruity Delights
Blend in a cup of frozen strawberries or raspberries to create a beautiful pink berry flavor. For a brighter taste, try adding frozen mango chunks, pineapple, or a drizzle of fresh passion fruit pulp.
Nutty & Rich
Add two tablespoons of creamy peanut butter or almond butter into the processor. The fats in the nut butter make the final product even richer and more satisfying. Top your bowl with crushed walnuts or pecans for a delightful crunch.
Spice it Up
Warm spices pair beautifully with the natural flavor of the fruit. Add a half teaspoon of cinnamon, a pinch of nutmeg, or a dash of ginger. This creates a comforting, dessert-like profile reminiscent of baked goods.
Decadent Desserts
For a special occasion, fold in some crushed graham crackers, cookie crumbles, or a swirl of vegan caramel sauce. Toasted coconut flakes also make a fantastic garnish.
Tropical Twist
Swap your standard splash of milk for rich, full-fat canned coconut milk. Add a teaspoon of fresh lime zest during the blending process to create a refreshing, island-inspired dessert.
Beyond the Bowl: Creative Ways to Enjoy Banana Ice Cream
Serving this treat in a bowl is just the beginning. There are many fun ways to incorporate it into your diet.
Ice cream sandwiches
Spread a thick layer of your frozen creation between two large oatmeal or chocolate chip cookies. Wrap the sandwiches individually in parchment paper and freeze them until solid for a perfect grab-and-go snack.
Smoothies and milkshakes
If your mixture gets too soft while blending, do not throw it away. Add a little extra milk and blend it into a thick, luxurious milkshake. It makes a fantastic base for morning breakfast smoothies.
Topping for oatmeal or pancakes
Drop a cold scoop over a bowl of hot oatmeal or a stack of warm pancakes. The contrast between hot and cold makes for an incredible breakfast experience.
Healthy pie crusts and tarts
Press a simple date-and-nut crust into a tart pan, fill it with your nice cream, and freeze until firm. Slice it like a pie for a stunning, healthy dessert presentation.
Kid-friendly treats
Spoon the freshly blended mixture into popsicle molds. Hide small pieces of fresh fruit inside the molds before freezing. This is an excellent way to get children to eat more fruit without them complaining.
Storing Your Homemade Delights
Proper storage ensures your healthy dessert recipe stays fresh and delicious for future cravings.
Best containers for freezing
Always use an airtight container. Shallow, wide containers work better than deep, narrow ones because they allow the mixture to freeze more evenly and make scooping much easier.
Preventing ice crystals
Air exposure causes ice crystals to form on the surface of your dessert. To prevent this, press a piece of parchment paper or plastic wrap directly onto the surface of the ice cream before sealing the container with its lid.
Re-blending for freshness
Because this recipe lacks the chemical stabilizers found in commercial brands, it will freeze very hard over time. If it becomes too difficult to scoop, let it sit on the counter for ten minutes. You can also break it into chunks and run it through the food processor again to restore its original creamy texture.
Shelf life
For the best flavor and texture, consume your homemade vegan ice cream within one to two weeks. While it remains safe to eat for up to a month, the quality will slowly degrade over time.
Frequently Asked Questions (FAQs)
Can I use unripe bananas?
Using green or unripe fruit is highly discouraged. Unripe fruit lacks the natural sugars needed to sweeten the dessert and will result in a starchy, unpleasant texture. Always wait for brown spots to appear on the peel.
How long does it last in the freezer?
When stored properly in an airtight container with a protective layer of parchment paper, it will last up to two weeks before the texture begins to suffer from freezer burn.
What if I don’t have a food processor?
A high-speed blender (like a Vitamix or Ninja) works perfectly. Standard, low-power blenders may struggle to process the frozen fruit. If you only have a standard blender, you will need to add more milk, which will result in a smoothie bowl texture rather than a firm ice cream.
Is it really healthy?
Yes. This recipe uses whole foods, contains no refined sugars, and offers essential vitamins and fiber. It is a fantastic alternative to heavy, calorie-dense traditional desserts.
Can I make it without any milk?
Absolutely. A powerful food processor can break down the frozen fruit entirely on its own. The splash of milk simply speeds up the process and helps the blades catch the fruit more easily.
Your Journey to Healthy Indulgence
Making a 3-ingredient banana ice cream recipe is one of the easiest and most rewarding culinary projects you can undertake. It provides all the joy of a traditional frozen dessert while delivering impressive health benefits. With practically zero prep time and low-cost ingredients, there is no reason not to keep a stash of frozen fruit ready to go.
Do not be afraid to get creative in your kitchen. Start with the classic base, and then try mixing in different fruits, nuts, and spices until you find your ultimate flavor combination. You have complete control over what goes into your bowl.
Grab some speckled fruit, slice it up, and place it in the freezer today. Enjoy your healthy homemade treat!
For more info please visit veganovtrichy.com